Friday, April 22, 2011
Heavenly Almond Biscotti
Seriously... so good!
Adapted from Alice Waters' The Art of Simple Food:
1 1/2 cups whole almonds
2 1/4 cups unbleached all-purpose flour
1 tsp baking powder
3 eggs
1 cup sugar
1/2 cup dried cranberries
3/4 t aniseed (worth a trip to the store!)
1/4 tsp lemon zest (optional)
1) Heat oven to 375.
2) Toast almonds for 5 minutes.
3) While they are toasting, combine eggs, sugar and lemon zest in a mixer. Beat until smooth.
4) Add flour and baking powder to mixer.
5) When almonds are toasted, Cuisnart them with the aniseed. If you don't have a Cuisinart, chop the almonds and don't worry about chopping the aniseed.
6) Stir almonds, aniseed and cranberries in by hand.
7) Form two loaves on a sheet of parchment paper, like this:
8) Bake for 25-ish minutes.
9) Remove loaves from oven. Turn oven down to 300. Let sit for 10 minutes.
10) Cut loaves into inch-wide strips. Mine were probably too wide.
11) Bake on each side for 10ish minutes.
12) Make another batch because you'll need more than one!
Sunday, April 3, 2011
How-To: Belt Loops
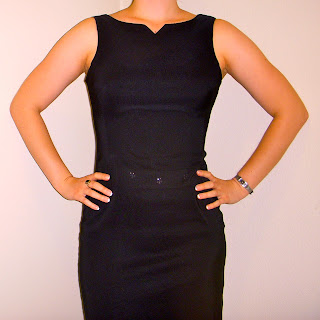
I bought an amazing dress for $10 in the late 90s (maybe 2000?). Back then I was young enough to be OK with rhinestones on my formal wear. I am amazed this dress still fits, because my body has definitely changed since I was thirteen. The rhinestones were not overwhelming, just little clusters around the waistband. Recently I had the idea that scraping them off with a credit card would be the answer. I was wrong. Rhinestone glue leaves residue:
And no, Goo-Gone doesn't work on rhinestone glue.
The only possible solution was to cover the waistband entirely. Or glue on more rhinestones. Kidding.
1) Cut a strip of fabric about an inch and a half wide that matches whatever garment you are attaching belt loops to. Err on the side of making it too long. If you are making two loops, cut the strip long enough to make three. I used black silk, which is super easy to work with.
2) Fold the strip in half and sew as shown:
3) Attached a safety pin to the end of the fabric tube.
4) Tuck the safety pin into the fabric tube and guide along the inside, turning the tube inside out as shown:
5) Press the belt loop you just created. You can use a regular iron, but I find a flatiron (like for your hair) is way less trouble for something this small.
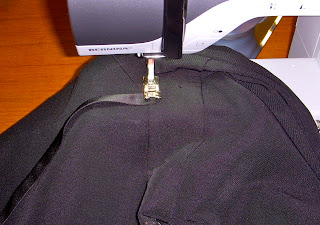
6) Place the belt loop pointing the opposite direction it will be sewn, as shown below. Sew in place with a small zig-zag stitch, encasing the frayed end of the loop.
7) Fold belt loop back toward correct direction and sew a crease into the loop, making the belt loop large than the waistband area. Tacking the ends of the loop down with prevent them from puffing out at your sides.
8) Measure how much more loop you will need and cut off excess. Repeat zig-zag stitching on other side of waist band:
9) Repeat above steps as needed for addition loops.
10) Happy accessorizing!
Labels:
cheap,
clothing,
fix-its,
sewing,
under 20 minutes
Subscribe to:
Comments (Atom)


