Showing posts with label gifts. Show all posts

Friday, April 22, 2011

Heavenly Almond Biscotti


Seriously... so good!

Adapted from Alice Waters' The Art of Simple Food:

1 1/2 cups whole almonds
2 1/4 cups unbleached all-purpose flour
1 tsp baking powder
3 eggs
1 cup sugar
1/2 cup dried cranberries
3/4 t aniseed (worth a trip to the store!)
1/4 tsp lemon zest (optional)

1) Heat oven to 375.
2) Toast almonds for 5 minutes.
3) While they are toasting, combine eggs, sugar and lemon zest in a mixer. Beat until smooth.
4) Add flour and baking powder to mixer.
5) When almonds are toasted, Cuisnart them with the aniseed. If you don't have a Cuisinart, chop the almonds and don't worry about chopping the aniseed.
6) Stir almonds, aniseed and cranberries in by hand.
7) Form two loaves on a sheet of parchment paper, like this:

8) Bake for 25-ish minutes.
9) Remove loaves from oven. Turn oven down to 300. Let sit for 10 minutes.
10) Cut loaves into inch-wide strips. Mine were probably too wide.
11) Bake on each side for 10ish minutes.
12) Make another batch because you'll need more than one!

Sunday, December 19, 2010

Peppermint Playdough


I love making this with my students -- they get very excited and have lengthy conversations about what color we should make the play dough this time. In the holiday spirit, we all agreed on green, with peppermint oil to scent it.
  • 4 cups water
  • 4 cups flour
  • 2 cups salt
  • 8 teaspoons cream of tarter
  • 4 tablespoons vegetable oil
  • food coloring
  • 15 drops essential oil -- peppermint or tea tree work best -- lavender and more gentle smells are overpowered by the natural salty scent of the play dough
1) Place all the ingredients in the pot. The order is not important, and kids get excited about helping pour each ingredient in. I would add food coloring and essential oil last, by an adult. Stir well.


2) Stir over medium heat. Mixture will begin to thicken on bottom of the pot. Scrape off thickened dough with a sturdy spoon. This takes some elbow grease!


3) The thickened dough will be darkened slightly. When no more "liquid" dough remains, cook for one minute longer, turning constantly, and then remove from heat. Continue stirring for a few minutes, scraping dough off bottom of pot.

4) Place balls of dough on a counter and let cool at least 5 minutes before allowing little hands to touch.

5) Play!


6) Dough can be stored in a plastic bag in the refrigerator for many months to come.

Wednesday, December 15, 2010

The Greatest Gift of All

During this festive time of year, I am humbly reminded that often the best gifts are not expensive, fancy, delicious, useful or beautiful. I was reminded of the true spirit of Christmas today by none other than my cat, who dragged my favorite gift into the living room.

Last year one of my students gave me a small package that appeared to be nothing more than a wad of crumpled gift wrap covered in tape. Upon unwrapping it, I revealed a single, rainbow shoelace. The gift was so simple, so silly, and so obviously from the heart that I laughed out loud and showed it to all my colleagues. Little Myles, you truly understand the meaning of Christmas; showing those around you how much you care.

Wednesday, December 8, 2010

"Hand" Made Gifts: Moisturizing Bee Balm


Winter time gives you dry hands. Working in a preschool gives you dry hands because you wash them every 30 seconds. I saw this recipe on This Chick Cooks, gave it my own twist, and violá! Gifts for my coworkers: Done.

I got the cute little jars at JoAnn Fabrics, on sale for 2 dollars each. I had all the ingredients (odd, I know... who has a big chunk of beeswax sitting in their craft basket? Me, apparently).

Here's a how-to:
  • 2 cups light olive oil (I used regular olive oil, and it made the balm green-ish yellow. I'm fine with that, but white would have been prettier.)
  • 1.5 cups chopped or grated beeswax (available from Amazon too, but I like to support independent companies). Use white for white balm, and yellow for a golden balm.
  • 15 - 20 drops essential oil (I used lavender and orange, but there are so many options)
  • Optional: If you want a nice rosy tint, you could add a drop or two of pink or peach gel food coloring. Only do this if you use light olive oil and white beeswax.
  • Optional: a cup of herbs like rosemary, mint, lavender or chamomile.
1) Put a pot of water on the stove to boil, with just enough water to come up half way on a small pot when placed inside. This smaller pot should be big enough to easily hold about 4 cups of liquid.

2) Start to chop or grate your beeswax. Don't worry about ruining your grater, with a little work the wax will melt off with boiling water. I recommend grating it into a metal or glass bowl, as plastic reacts strangely and static-y with the grated wax.


3) When your water is boiling, add your olive oil to the small pot. If you are using herbs, add them now. Let heat for 15 minutes. Be sure the water isn't boiling over the edges of the oil pot. After 15 minutes, strain out herbs.


4) After 15 minutes (or when you've grated enough beeswax), add the beeswax to the small pot. It will melt very quickly. Stir.


5) Add essential oils and coloring as desired.

6) Test the thickness of the balm by dipping a spoon into the pot and scooping up a little of the mixture. Quickly remove and set on a paper towel. It should solidify in a few minutes. If it's too liquid for your taste, add more wax. If it's too solid, add more olive oil. 

7) Remove from heat and pour into containers. I recommend using a funnel for this.


8) Pour the pot of boiling water over your grater, spoons, and other utensils that are now caked in the balm. You might consider doing this outside over pavement or grass, as to prevent sink clogging.

9) Allow the containers to sit out for several hours, or until the balm is solid. 


Tip: If you make more than your containers will fit, you can pour it into a small jar. This jar can later be reheated using the same double-boiler method, and the melted balm can be poured into new or empty containers.

Friday, December 3, 2010

Creative Gift for a 5 Year Old


I was "Jake's" first babysitter when he was an infant. Even though we don't see each other very often anymore, I have yet to miss one of his birthday parties, and this year is no exception. Sticking with my theme of "on a budget," I wanted to give him a gift that let him know how special he is to me, without breaking the bank. He has plenty of toys, books, and stuffed animals. So I opted to wrap up a little something to remind him of one of our favorite things to do on a rainy day: make cookies.

The box contains all the ingredients, plus instructions, to make chocolate chip cookies, our favorite. Of course he'll need mom's help, but I feel good about giving a meaningful gift that won't just pile up in a toy basket, be outgrown, or end up in a landfill.

Saturday, November 20, 2010

Mint Tea Leaves

Mint is one of those herbs that always goes rogue. It's nearly impossible to permanently remove from a garden because the roots are so pervasive. So if you're considering planting it, I suggest planting it in a pot to control spreading. Unless you WANT more mint than you know what to do with.

Once your mint has become the octomom of herbs, here's something you can do with it. Mint tea is a great tummy soother and a wonderful herbal alternative to a caffeinated morning beverage. To make your own tea leaves:

1) Harvest your mint sprigs. Wash thoroughly and let dry for several hours.

2) Put the washed and dried sprigs in an oven at 180 degrees Fahrenheit. It will dry without a loss of any oils or fragrance.  
 

Cooking times vary depending on the type of mint you are using. The mint shown, lemon mint, only took 25 minutes to completely dry into tea leaves. But heartier types of mint, such as spearmint or peppermint, will take longer. 


3) Remove the sprigs from the oven and strip the dried leaves from the branches.


4) Store the dry leaves in an airtight container in a cool, dry and dark area. Use a spoonful of crumbled leaves for each cup of tea with a strainer. You can also make your own teabags from muslin. These make a great gift!

    Monday, October 25, 2010

    Mint Facial Mist

     
    My mint plant is very happy on my deck, and now that summer is over there are fewer food recipes that call for it. I could make tea, but I'd rather start making Christmas gifts. And it's been awhile since I posted something that wasn't about food!

    Mint Facial Mist
    -1 c. witch hazel (available at most drug stores for about $5)
    -1/2 c. fresh mint
    -1/2 c. fresh rosemary
    -Peel from 1 orange, 2 tangerines or a lemon

    1) Combine ingredients in an 8 oz. glass jar or other container you can tightly seal.


    2) Cover with a lid and shake well.
    3) Leave in a cool, dark area (such as a pantry or cabinet) for at least one week.
    4) Strain off solids using fine muslin or a paper coffee filter.


    5) Put solution in a pretty misting bottle.


    Courtesy of Design Sponge.

    Tuesday, October 19, 2010

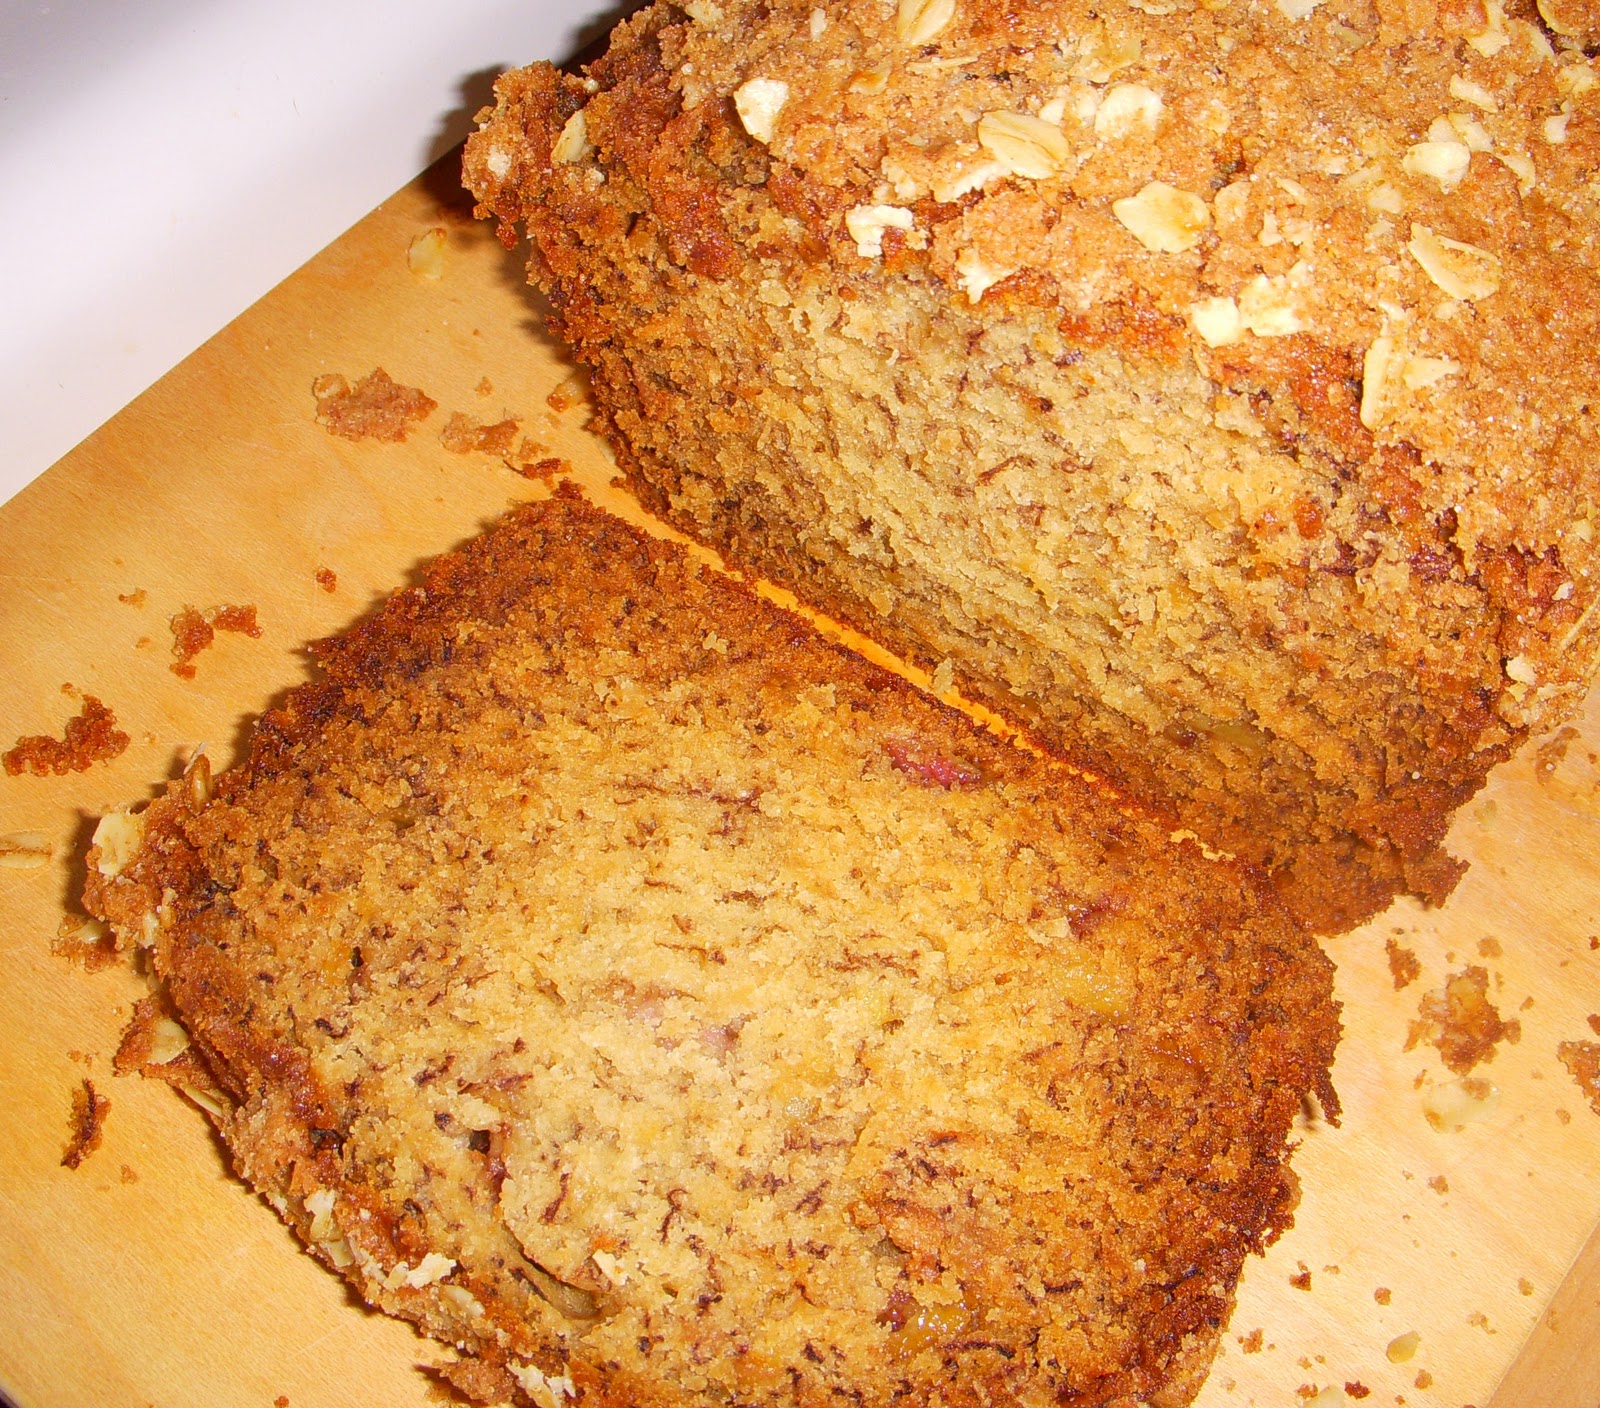
    Easier Banana Bread

    This recipe is less work, less ingredients, and just as delicious. Courtesy of Heidi Bakes*. Topped with Streusel*.

    1) Preheat oven to 350.
    2) Butter or spray one bread loaf pan. Try putting a rectangle of baking parchment on the bottom of the sprayed pan, and spraying the parchment. Makes the bread slide out easier after it's baked.
    3) Combine ingredients in the following order:
    • 5 or 6 over-ripe bananas, smashed
    • 2/3 cup melted butter
    • 1 1/2 cups granulated sugar
    • 2 eggs
    • 2 tsp vanilla
    • 2 tsp baking soda
    • dash of salt
    • 3 cups cups flour
    4) Pour into loaf pan.
    5) Add streusel if it fits your fancy.
    6) Bake for an hour. This bread rises a lot, so be sure it has plenty of room to rise in the oven. Mine got a little caught in the rack above it.
    7) Put in an airtight container or bag. Freeze if you won't eat it within 3 days.

    Saturday, October 9, 2010

    Friday, October 8, 2010

    Harvest Spice Muffins

    This recipe came about quite on accident. I had a cold, and needed to use up the mushy bananas, so I set out to make banana bread. But the cold medicine made me a little loopy, and while I was certainly creative with my substitutions that day, I forgot to add the bananas. So I give you: Harvest Spice Muffins

    Combine:

    3 1/4 cups all-purpose flour

    2 teaspoons baking soda

    1 teaspoon pumpkin pie spice (if you don't have any, increase the amount of the three spices below)

    1 teaspoon cinnamon

    dash of nutmeg

    dash of ground cloves

    1/2 teaspoon salt

    Set aside.


    Mix with beaters on high for 5 minutes:
    4 large eggs

    1 3/4 cups sugar


    Preheat oven to 350. Grease and flour 2 muffin tins.

    Then add to egg mixture:
    3/4 cup vegetable oil
    2 teaspoons vanilla

    1/4 cup crème fraîche, or yogurt, or sour cream, cream cheese or leftover cream cheese frosting, or if you have none of the above... wait for it... one butterscotch Handi Snak pudding. You're welcome.


     Combine with dry ingredients, then stir in 1 1/3 cups walnuts (or however much you want to put in, if you choose to at all). Pour into muffin tins. Bake for 20 minutes, then test with knife. When it comes out clean or with crumbs, take out. Store in a Ziploc bag or freeze if you won't finish them in the next few days.

    Monday, September 27, 2010

    Yummiest Popcorn (Sweet)

    Thanks to my fellow crafting friend Sara, I was introduced to "folksy crack" about a year ago. Be forewarned, it is impossible to stop eating this stuff.


    Caramel Corn
    adapted from Damn Good Sweet by David Guas and Raquel Pelzel

    10 cups freshly popped popcorn (this is about one "load" in a air popper... but for a lighter caramel coating, try two loads and spread the love)
    1 cup packed brown sugar
    1/4 cup light corn syrup
    6 tablespoons unsalted butter, melted
    1/4 teaspoon salt
    1/2 teaspoon baking soda
    1 Tablespoon vanilla extract
    1 - 2 cups plain peanuts (can be omitted, or you can use almond slivers for a different taste)

    Preheat oven to 250* (see note), and line a rimmed baking sheet (or two) with parchment paper.

    Pop popcorn and place on parchment lined baking sheets and sprinkle peanuts (or almonds, or nothing) on top.

    In a large, heavy bottomed saucepan, mix sugar, corn syrup, butter, and salt with 2 tablespoons of water. Pre-measure your vanilla and baking soda in a small prep dish, as you won't have time once the caramel reaches 250 degrees.  Heat over medium high heat, stirring frequently, until a candy thermometer reads 250 degrees (this should take less than five minutes once the caramel is at a simmer). Do not try to make this recipe without a candy thermometer. Working quickly, remove the pan from the heat and stir in baking soda and vanilla. Pour the caramel over the popcorn and mix with a spatula until it is well coated.

    Bake for 45 minutes, stirring every 15 minutes, making sure to get the caramel and peanuts off the bottom of the pan and onto the popcorn. If you don't stir/flip/toss/rearrange the popcorn, the caramel will burn and you will be sad. Let cool, and break up any large clusters of popcorn that have formed before serving. 


    This popcorn makes a great gift... if you resist eating it long enough to give it away!


    * Note: some ovens go into "broil mode" at this low temperature. If this is the case with your oven, place the rack as far from the active heat coil as possible and check often to ensure your popcorn isn't burning. Because that would be absolutely tragic.

    Tuesday, August 31, 2010

    Knitting Cake

    It's been a while since I've had a non-food post... so here ya go.

    I come by my craftiness naturally; my mother is a musician, knitter, cook, crafter, and most remarkably, an amazing calligrapher* (she does wedding invites, if you're in the market...). She is also hard to shop for. So when her birthday came around in May, I lucked out when I stopped by a yarn sale in Oakland, and the saleslady suggested I make a "cake" out of a giant skein of yarn she was trying to get rid of. So I bought the skein and some ribbon, and picked up some cake toppers with candles at the drug store, and 15 minutes later I had this:

    She loved it so much she refuses to knit with it, and it sits perched in her living room 4 months later. Good thing it's not a real cake!