Sunday, April 3, 2011

How-To: Belt Loops

I bought an amazing dress for $10 in the late 90s (maybe 2000?). Back then I was young enough to be OK with rhinestones on my formal wear. I am amazed this dress still fits, because my body has definitely changed since I was thirteen. The rhinestones were not overwhelming, just little clusters around the waistband. Recently I had the idea that scraping them off with a credit card would be the answer. I was wrong. Rhinestone glue leaves residue:

 And no, Goo-Gone doesn't work on rhinestone glue.

The only possible solution was to cover the waistband entirely. Or glue on more rhinestones. Kidding.

1) Cut a strip of fabric about an inch and a half wide that matches whatever garment you are attaching belt loops to. Err on the side of making it too long. If you are making two loops, cut the strip long enough to make three. I used black silk, which is super easy to work with.

2) Fold the strip in half and sew as shown:
 3) Attached a safety pin to the end of the fabric tube.
 4) Tuck the safety pin into the fabric tube and guide along the inside, turning the tube inside out as shown:


 5) Press the belt loop you just created. You can use a regular iron, but I find a flatiron (like for your hair) is way less trouble for something this small.

6) Place the belt loop pointing the opposite direction it will be sewn, as shown below. Sew in place with a small zig-zag stitch, encasing the frayed end of the loop.

 7) Fold belt loop back toward correct direction and sew a crease into the loop, making the belt loop large than the waistband area. Tacking the ends of the loop down with prevent them from puffing out at your sides.

8) Measure how much more loop you will need and cut off excess. Repeat zig-zag stitching on other side of waist band:
 9) Repeat above steps as needed for addition loops.

10) Happy accessorizing!


Monday, March 28, 2011

How-To: Ballerina Sweater

Finished product!
In continuing with the updating of my wardrobe for $0, I decided to make a quick alteration before heading out today. This sweater is a beautiful color and I love the pattern, but the length was super awkward. It was kind of regular length, but not as long as any of my shirts, making my somewhat long torso look stocky. Not cool, sweater.

How-To:
1) Put on the sweater. Look in the mirror and note how much you want to crop.
2) Cut half an inch LESS than you want to trim off (allows for a seam). Err on the side of cutting too little off. You can always make it shorter if the sweater is still an awkward length.

3) Sew a very thin seam along the bottom edge using a ZIG ZAG stitch. This is important so the bottom hem doesn't get stretched out.

4) Try on the sweater. Chances are it's going to look a little funny... too loose around the bottom part. If it does, take in the sides and sew two darts in the back. Make sure to space them evenly:
 5) Trim threads, try on, and adjust anything that looks funny.

Saturday, March 19, 2011

Quick Wardrobe Fixes

Not my closet. I wish!!!
I've had the urge to update my wardrobe this week. But my bank account does not have that same urge. So last night I did a multi-closet purge. Every closet, cabinet, wardrobe, shelf and drawer. I decided to pitch everything I don't feel GREAT in. Why would I keep clothing that makes me feel too old, too young, or unattractive? Why do I own it in the first place?

Eliminating clothing doesn't really update anything, does it? So here's what I did...

Exhibit A:
Sweater/shirt that screams "preschool teacher!"
  Snip, snip, whirrr. Off come the sleeves and hems go into the arm holes. Result:

Now I just need a nice button-down to wear under it.

Exhibit B: Flowy dress that is awkwardly stuck between here and the 70s.


Snip, snip, whirrr. Cut four inches off the oversized ruffle and hem. Welcome to 2011, sundress.


Wednesday, March 9, 2011

Sparkling Lemon Cocktail


My parents have an overachieving lemon tree. Despite it hovering around freezing most nights the past few weeks, this little lemon-tree-that-could has borne over 200 lemons. I kid you not. What the heck am I going to do with 200 lemons? After unloading as many as I could onto friends and coworkers, I had to acknowledge the lemon problem. Get ready, friends. Lemon recipes all over this blog.

It so happens that Cooking Light chose to do a spotlight on meyer lemons this month. Coincidence? I think not.

Taken from their March issue:
  • 1  cup  water
  • 1/3  cup  sugar
  • 1  rosemary sprig
  • 1  cup  fresh Meyer lemon juice, chilled
  • 1/3  cup  chilled vodka
  • 2  cups  chilled Prosecco or other sparkling wine, chilled
The rosemary sprig really is key! Such a wonderful addition to an already awesome cocktail. 


Friday, March 4, 2011

Maple Muffins

Sometimes my students get tired of our usual snack rotation. This spontaneous culinary adventure was a big hit with the little ones and the staff members who ate every leftover crumb.

Below I have cut down the sugar from the original recipe, which was so sweet it bordered on cupcakes. Delicious, but I'm hesitant to pump little ones full of sweets.
  • 2 cups unbleached all purpose flour
  • 1 cup quick-cooking oats
  • 2 teaspoons baking powder
  • 2 teaspoons ground cinnamon
  • dash of nutmeg
  • 1/2 teaspoon baking soda
  • 1/2 teaspoon salt
  • 1 cup low-fat buttermilk (or substitute)
  • 1/2 cup vegetable oil
  • 1/2 cup pure maple syrup
  • 1/4 cup packed golden brown sugar
  • 1 large egg
  • 2 teaspoons vanilla extract
1) Make your buttermilk substitute: one cup yogurt or milk (or almond milk) and one tablespoon white vinegar or lemon juice. Let sit for 5 minutes. 

2) Line a muffin tin with muffin cups.

3) Combine flour, oats, spices, salt and baking powder in a large bowl.

4) Whisk buttermilk, applesauce, maple syrup, brown sugar, vegetable oil, egg and vanilla in medium bowl until well blended. 
 
5) Add to dry ingredients and stir just to incorporate (do not overmix).

6) Divide batter equally among muffin cups. 

7) Bake until muffins are a beautiful golden brown and tester inserted into center of muffins comes out clean, about 28 minutes.

Saturday, February 26, 2011

Apple Pancake

I'm back!

I made this easy, delicious dish for friends last weekend. Sharing the wealth!
  • 3 T unsalted butter
  • 2 apples
  • 2 T brown sugar
  • 1 T lemon juice (optional)
  • 1/2 cup milk
  • 1/2 cup all-purpose flour
  • 2 large eggs
  • 1 tablespoon granulated sugar
  • 1/2 teaspoon vanilla
  • 1/4 teaspoon salt
  • Confectioners sugar for dusting
1) Preheat over to 400.
2) Slice apples and saute with butter in an oven-safe pan over medium heat.


3) Prepare your pancake batter: milk, flour, eggs, granulated sugar, vanilla and salt.
4) Squeeze lemon juice over apples. Add sugar. Allow to cook for a minute more or so, until apples are tender.
 5) Turn off burner and pour pancake batter over apples.
 6) Bake in pan at 400 for 15 - 20 minutes.
 7) Dust with powdered sugar and serve warm. Yum!

Wednesday, January 26, 2011

Deep Clean: The Laundry Room

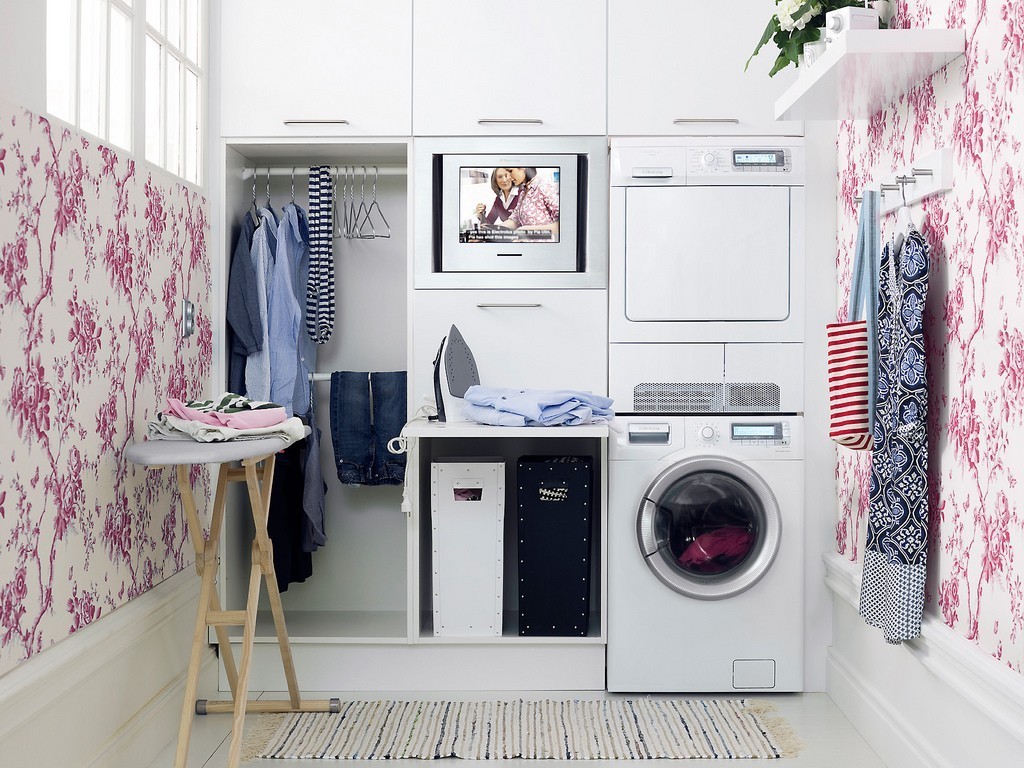
Someday I will have a laundry room as awesome as the one above. But until then, I'll be grateful for the closet with a stackable washer-dryer I have.

Weekly and even monthly cleaning plans don't usually include the laundry room. If you're lucky enough to have a laundry room, even a small one, or a closet with a stackable, take good care of it!

The Washer:
Run white vinegar through the washer. This will sanitize the inside and clear away soap scum.

The Dryer:
Empty the lint trap. Wipe off fuzz with a used fabric-softener sheet.
Vacuum the inside of your lint trap area. 
Wipe the interior walls of the dryer. Use a cloth dampened with dishwashing liquid and warm water. Scrub any linty residue around the trap opening with an old toothbrush, if necessary.

All Appliances: Wipe down the outside of each appliance. Clean the fronts, sides, and tops using Homemade Natural Cleaning Products.

The Floor:
Run a dust mop underneath the washer and the dryer, if it fits. Airborne lint can get kicked underneath the appliances. Then wipe with cleaning solution.

The Dryer Hose:
Run an extendable duster around the inside of the dryer hose, if you have access to it. Or vacuum it with a crevice attachment. Either method will clear away the lint that accumulates on the walls of the hose.

The Backs of the Washer and Dryer:
Clean behind the appliances. If you have a stackable, I would not attempt to move it. On a low setting, with a brush attachment, vacuum the backs of the washing machine and the dryer and the flooring underneath. To reach behind the units, move the machines using appliance wheels or casters (available at hardware stores). Be careful not to stretch the dryer hose. If the hose looks too short, disconnect it first.

The Vents:
Using a brush attachment, vacuum the vents on a high setting. Wipe the vents’ grates with a damp cloth.