Sunday, November 28, 2010

The No-Shop Challenge


I noticed something the other day. I noticed that my kitchen is overflowing. I only cook for two people, but I'm pretty sure I have enough food to feed a family of eight at any given time. This is most likely due to the following:
  • I over-shopped for Thanksgiving
  • Thanksgiving yielded lots of leftovers
  • I like to have lots of options when I start getting creative in the kitchen
  • I go grocery shopping every week
  • I shop at Costco for many things, thus creating stock-piles of certain foods like canned beans, pasta, chocolate chips, flour, onions, peanut butter, sugar and frozen chicken
In an effort to make up for going over-budget on groceries the past few... months, I am challenging myself to use what I have.

That's right. For the next month, I will not go grocery shopping. Wait, I take that back. For the next month, I will only allow myself to purchase:
  • eggs and dairy (but no specialty cheeses and such)
  • fresh fruit and veggies (AFTER I use the fresh and frozen we have)
  • brown sugar (it's Christmas...)
  • wine (for entertaining and gifts only)
  • cat food
By doing this, I will be saving:
  • Money
  • Gas
  • Time
  • Food
  • Myself from the evils of over-consumerism
So here are my official no-shop challenge rules:
  1. No grocery shopping until January 1 except for above-mentioned items
  2. I cannot cheat by buying groceries at the drug store or mega-stores like Target.
  3. Gift certificates and store-credit cannot be used until January unless it's about to expire
  4. Accepting leftovers, gifts and home-grown produce from friends and family is OK. (Thanks for those beautiful pomegranates, Grandma!)
  5. I can't ask JT to buy groceries for me.
  6. I will still cook the same number of meals per week, but I will only use ingredients I have.
  7. If I don't have the ingredients I need, I will use a substitution or create something new and different.
I'll let you know what I create!

And what about YOU? Do you think you could take on the no-shop challenge? What will you make?

Saturday, November 27, 2010

Thanksgiving Leftover Cooking: Curried-Turkey Wrap


Thanksgiving is over. What to do?

Recipe adapted from this Real Simple recipe. Makes three servings:

  • About a cup and a half of leftover Thanksgiving turkey, give or take
  • 1/4 cup mayonnaise
  • 2 celery stalks
  • one teaspoon curry powder, or more if you like -- see this recipe* for a home-made version!
  • a handful of raisins, dried cranberries, cut-up grapes or small pieces of apple
  • pita bread or tortillas

1) Pull turkey meat into small pieces or use a Cuisinart to chop.
2) Chop two sprigs of celery (in a Cuisinart if you have one).
3) Combine everything in medium bowl. Taste-test to see if you want to add more curry powder.
4) Put a spoonful or two into your pita or tortilla.
5) Yum!

Make-Your-Own Curry Powder


This is kind of a recipe, kind of guidelines, but mostly a post encouraging you to be creative.

I wanted to try a recipe using my Thanksgiving leftovers. I had everything except curry powder. I always try to not make special trips to the store when I can use a viable substitution. So here's my curry powder substitution.

I used this recipe from eHow. But I didn't have everything it called for, and I didn't want to make a huge amount. So I used what I had, threw in a few other things, and here's what my final product contained (approximately):

2 t turmeric
1 t cumin
1 t garlic salt
1/2 t ground ginger
1/2 t dry mustard
1/2 t chili powder
1/4 t allspice
1/8 t cinnamon
1/8 t nutmeg
1/8 t cayenne pepper
dash of ground pepper

Combine in a clean recycled spice jar. Seal and shake. Go ahead and cook with it!

Wednesday, November 24, 2010

Holiday French Toast


If you get e-mail, most likely in the last few years you've been sent the "Recipe Exchange" e-mail, where you send a few strangers one of your favorite recipes and get a few new ones back. I'm always hesitant to participate in chain letters, even if it includes tastiness. But I did get a few gems from participating, and this is my adapted version of one:

Holiday French Toast

6 pieces bread
4 eggs
1/2 cup milk, cream, half and half, rice milk, soy milk or almond milk
1/2 t vanilla
1 t pumpkin pie spice or cinnamon
dash of nutmeg
1/4 cup orange juice
1 oz brandy
2 T butter
syrup

1) Melt butter in a skillet over medium heat.
2) Combine eggs, milk, vanilla, spices, orange juice and brandy in a pie pan, casserole dish, or other piece of bakeware convenient for soaking the bread.
3) Soak 2 pieces of bread at a time in the liquid.
4) Run your hand under water. Shake onto skillet. If it sizzles, your pan is ready.
5) Cook 2 pieces of toast at a time, flipping after a minute or two.
6) Serve with plenty of syrup. This toast goes well with Good Earth herbal tea.

Extra French toast can be frozen and reheated for a quick weekday breakfast.

Monday, November 22, 2010

Chocolate Pumpkin Muffins


Pumpkin AND chocolate? I'm in. These muffins are surprisingly light and fluffy, with a nice kick of pumpkin spice. The texture of the almonds is wonderful.

This would be a great Thanksgiving-breakfast meal!

I found this recipe on a bulletin board in the kitchen at work (where we do a lot of baking for the tots). No idea it's original source. I made a few alterations for maximum yumminess.

  • 1/2 cup almonds
  • 1 2/3 cups flour
  • 1 cup sugar
  • 1 T pumpkin pie spice
  • 1 t baking soda
  • 1/4 t baking powder
  • 1/4 t salt
  • 2 eggs
  • 1 cup pumpkin (half a one-pound can)
  • 1/4 cup yogurt or milk if needed - you can also use this if you have less than one cup of pumpkin
  • 1/2 cup butter (one stick), melted
  • 1 cup chocolate chips (these are sort-of optional if you want to make a less sugary version... but who makes chocolate optional?)

1) Chop almonds until pieces are fine.

2) Grease a muffin tin and preheat oven to 350.
3) Combine flour, sugar, spice, baking soda, baking powder, and salt, and whisk to blend. Set aside.
4) Combine pumpkin, eggs and butter (melted). Blend well.
5) Add almonds and chocolate chips to wet ingredients. Stir with spoon or spatula (do not use mixer).
6) Add dry ingredients and stir with spoon until mixed.
7) If the mixture is too dry, add a little yogurt or milk. Mixture will not be gloppy like pancake batter, but shouldn't stand in stiff peaks.
8) Spoon into muffins tins or a small cake pan. These muffins rise, so don't fill to the top. Optional: top with streusel.
9) Bake for 20 - 25 minutes, or until a knife comes out clean.

These muffins are great with hot coffee or cold milk. They are especially tasty the next day!

Saturday, November 20, 2010

Mint Tea Leaves

Mint is one of those herbs that always goes rogue. It's nearly impossible to permanently remove from a garden because the roots are so pervasive. So if you're considering planting it, I suggest planting it in a pot to control spreading. Unless you WANT more mint than you know what to do with.

Once your mint has become the octomom of herbs, here's something you can do with it. Mint tea is a great tummy soother and a wonderful herbal alternative to a caffeinated morning beverage. To make your own tea leaves:

1) Harvest your mint sprigs. Wash thoroughly and let dry for several hours.

2) Put the washed and dried sprigs in an oven at 180 degrees Fahrenheit. It will dry without a loss of any oils or fragrance.  
 

Cooking times vary depending on the type of mint you are using. The mint shown, lemon mint, only took 25 minutes to completely dry into tea leaves. But heartier types of mint, such as spearmint or peppermint, will take longer. 


3) Remove the sprigs from the oven and strip the dried leaves from the branches.


4) Store the dry leaves in an airtight container in a cool, dry and dark area. Use a spoonful of crumbled leaves for each cup of tea with a strainer. You can also make your own teabags from muslin. These make a great gift!

    Friday, November 19, 2010

    Do Now: Make and Freeze Christmas Cookies


    You'll be glad you did when all you have to do is defrost and decorate them!


    • 1 cup unsalted butter, room temperature
    • 1 cup (packed) golden brown sugar
    • 1 large egg
    • 1 teaspoon vanilla extract
    • 2 2/3 cups all purpose flour
    • 1 teaspoon baking powder
    • 1/2 teaspoon salt
    • 1/2 teaspoon ground nutmeg


    Recipe is in so many locations no one knows where it originated:

    Using electric mixer, beat butter and sugar in large bowl until fluffy. Beat in egg and vanilla. Sift flour, baking powder, salt and nutmeg over; stir to blend well. Turn dough out onto lightly floured surface and knead gently 1 minute. Shape dough into 1/2-inch-thick rectangle. Cut into 4 equal pieces; wrap in plastic and refrigerate at least 3 hours and up to 1 day. Let dough soften slightly at room temperature before rolling out.

    Position rack in center of oven and preheat to 350°F. Butter large baking sheet. Working with 1 dough piece at a time, roll out dough on lightly floured surface to 1/8-inch thickness, lifting and turning dough often and dusting surface very lightly with flour to prevent sticking. Cut out cookies. Transfer cookies to prepared baking sheet, spacing 1 inch apart (cookies will not spread). Gently reroll dough scraps; cut out more cookies. Transfer to same sheet.

    Bake cookies until light brown, about 11 minutes. Let cool 5 minutes on sheet. Transfer cookies to rack; cool.

    Repeat with remaining dough pieces

    Thursday, November 18, 2010

    Wholesome Rice Pudding


    This dish is a favorite with my students. Slightly oatmeal-ish, but smoother and creamier. Also, calling it "pudding" instead of "cereal" makes it more appealing to little tummies.

    1 cup rice
    3 cups water
    2 T butter
    1 t cinnamon
    1/4 t nutmeg
    1/2 cup cream, half and half, or milk (nonfat milk will not have as creamy a result)
    3 T raisins (optional)
    2 T maple syrup or brown sugar
    1 t vanilla


    1) Put the rice, water, butter and spices in a pot over medium heat.


    2) Simmer until the water has boiled down significantly. Be sure to stir often, as rice sometimes sticks and burns to the bottom of the pan.
    3) Add the cream and raisins and simmer until thickened, stirring often.

    4) Removed from heat and add maple syrup and vanilla.
    5) Serve warm or cold.
    Yum!

    Wednesday, November 17, 2010

    Green Beans with Caramelized Onions and Toasted Almonds


    Yum! Scouring other blogs for the best recipes usually pays off. Adapted recipe courtesy of The Mother Huddle with original recipe from the Food Network.

    Ingredients:

    A handful of almonds
    One tablespoon butter
    2 - 3 tablespoons olive oil
    Half an onion
    Dash of salt
    Half to one pound (approximately) green beans

    1) Heat one tablespoon of butter and 2-3 tablespoons of olive oil in a medium skillet over medium-low heat.
    2) Chop half an onion up and place in skillet, stirring every 2 - 3 minutes. (If you have a food processor, don't use it, the pieces will be too small for the final product.)

    You want these to soften and then turn a lovely caramel color. This will take about 20 - 25 minutes total, but stir often. If the edges of the onions start to darken and get crisp, turn the heat down.
    3) While the onions are cooking, chop up a handful of almonds.

    4) In a large, dry skillet over medium heat, toast your almonds. This will take 3 - 5 minutes. Place in small bowl.

    5) Put several cups of water in the skillet you just toasted your almonds in. Turn temperature up to high.
     6) Check on your onions. Be very careful not to cook them too quickly (heat too high). I burned them at first and had to start over.
    7) Wash and remove stems from green beans.

    8) Once the skillet of water is boiling, add a dash of salt and your green beans. Cover. Set timer for 8 minutes.

    9) Continuously check and stir your onions.
    10) Remove green beans from heat after 8 minutes. Drain.
    11) When onions have reached a nice caramel color, add the almonds and green beans.

    Stir for just a few seconds, then remove from heat. Serve immediately. Season with salt and pepper if you like, but I don't think it needs it.

    Tuesday, November 16, 2010

    Simple Risotto

    The original recipe was good, but I found it too salty and some of the ingredients too specific. Here's my adapted version, for a lower sodium version that's also easier on your wallet.

    Ingredients

    • 3 tablespoons unsalted butter
    • 1/2 medium onion, finely chopped - for children or onion-opposed eaters, try pureeing your onion (thanks Mom!)
    • black pepper
    • 1 cup rice
    • 1/2 cup white wine
    • 3 1/2 cups low-sodium chicken broth, plus more if needed
    • 1/2 cup cheese, preferably parmesan, but we're not picky. I combined some shredded cheddar with Kraft dried Parmesan.
    • fresh flat-leaf parsley

    Directions

    1) Melt 2 tablespoons of the butter in a large skillet over medium heat. You can also you a rice cooker for this entire recipe.
    2) Add the onion and ¼ teaspoon pepper and cook, stirring occasionally, until softened.

    3) Add the rice and cook, stirring, for 2 minutes.
    4) Add the wine and simmer until absorbed.

    5) Add half the broth (1 ¾ cups) and simmer, stirring once, until absorbed. Cooking time will vary greatly depending on what kind of rice you use.
    6) Add the remaining broth and simmer, stirring once, until the rice is tender and creamy. If the rice is not cooked through and the mixture is dry, add more broth and continue to cook until tender.
     
    7) Stir in the cheese and the remaining tablespoon of butter. Sprinkle with the parsley and additional Parmesan, if desired.
      Adapted from Real Simple.

      Sunday, November 14, 2010

      Bananas Foster Bread


      I love banana bread. This is a tasty variation, with my own twist, courtesy of Cooking Light. Enjoy!
      • 1 1/2  cups mashed ripe banana (about 2)
      • 1 cup packed brown sugar, divided
      • 6  tablespoons butter, melted and divided
      • 1/4  cup cognac, dark rum, or brandy divided
      • 1/3 cup plain fat-free yogurt or buttermilk (or buttermilk substitute*)
      • 2  large eggs
      • 1 1/2 cups all-purpose flour
      • 3/4 teaspoon baking soda
      • 1/2 teaspoon salt
      • 1/2  teaspoon  ground cinnamon
      • 1/4 teaspoon nutmeg
      • 1/8  teaspoon  ground allspice
      • Cooking spray
      • 1/3  cup  powdered sugar
      1) Mash bananas.
      2) Put bananas, half a cup of brown sugar, three tablespoons of alcohol and five tablespoons of butter in a saucepan over medium heat.
      3) Mix flour, salt, baking soda and spices in a separate bowl.
      4) Stir banana mixture occasionally until butter is melted and mixture begins to bubble.
       5) Pour banana mixture into bowl. Add eggs, remaining sugar, and yogurt.
      6) Add gradually to wet ingredients
      7) Pour into loaf pan.
      8) Bake for 50 minutes or until a knife comes out clean.
      9) Remove from oven and allow to cool.
      10) Melt remaining tablespoon of butter in a microwave-safe cup. Add a tablespoon of cognac/rum/brandy and 1/3 cup powdered sugar. Pour over warm bread.


      Thursday, November 11, 2010

      Homemade Pizza


      The quest for the perfect home-made pizza crust is finally over. It may take a little more time than ordering in, but I think it's worth it.

      • 2 packages of yeast, divided
      • 7 cups flour, divided (you can use a cup or so of whole wheat for a more wholesome crust, but any more than that will make it very heavy)
      • 2 teaspoons salt
      • warm water
      • corn meal to dust bottom of crust
      • olive oil (optional)
      • sauce and cheese and other toppings

      Prepare the day before:

      1) Place one cup of warm water in a large bowl (your mixer, if you have one). Sprinkle in one teaspoon (NOT a whole package) of yeast. Do not mix. Sprinkle 1/4 teaspoon of flour on top. Let sit for 5 minutes.

      2) Add one cup of flour, mixing well.
      3) Let sit overnight (about 12 hours). It will look spongy.

      4) In the morning, add a 1.5 cups warm water, the remaining yeast, and salt. Begin mixing in flour one cup at a time.

      5) Place dough in an oiled bowl, cover and let rise for two hours.
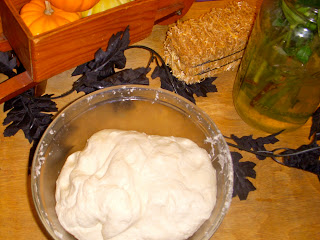
      Dough will have doubled.
      6) Punch down. Return to refrigerator for at least 3 more hours.
      7) Roll dough into log.
      8) Cut into eight pieces.
      9) Roll into balls. Cover with a dish towel for an hour and a half.
      10) Preheat oven to 475.
      11) Press, squeeze and stretch dough into rounds.
      12) Press rounds onto plate of corn meal. Do not bake in corn meal as shown, it will burn and smell bad.
      13) Brush with olive oil (optional). Top as desired.
      14) Bake for 12 - 14 minutes.

      It's not delivery, it's home-made.