My Cousin "Alice" is having a baby boy in a few months! We're very excited -- this is great-grandchild number two for my grandma, and also the second boy. I guess it will be my job to have the first girl. But I'm in no rush -- I'm going to wait until I'm a licensed therapist to have children.
The composition of this cake was quite a journey. I started by making the gum paste flowers several weeks ahead (during nap time at work, actually). Gum paste flowers make a mediocre cake look great, and a great cake look amazing. If you want to do things the hard way, make them yourself (although I suggest taking a class or REALLY researching how to do them), or you can buy them for way less trouble at many cake supply stores.
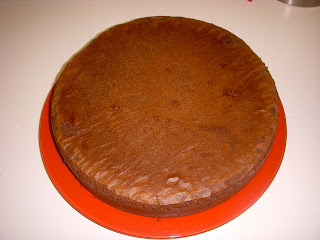
Next came the actual cake part, which I made two days ahead. I used an Epicurious recipe. Please note I doubled the recipe from what is listed below because I was using an extra-large cake pan (so my cake is twice as large as the recipe that follows).
- 4 ounces unsweetened chocolate
- 1/2 cup hot water
- 1 3/4 cups cake flour
- 1 teaspoon baking soda
- 1/2 teaspoon salt
- 1/2 cup (1 stick) unsalted butter, room temperature
- 1 3/4 cups sugar
- 3 large eggs, room temperature
- 1 teaspoon vanilla extract
- 2/3 cup whole milk
- optional: 3 Heath Bars (toffee) broken and ground into small pieces
2) Preheat oven to 350. Cut 2 circles out of parchment paper. Grease 2 cake pans (or one large one). Place parchment paper at bottom and grease again.
3) When chocolate is creamy, remove from heat. Stir occasionally.
4) Combine flour, baking soda and salt.
5) Beat butter until it is smooth and fluffy. Add sugar gradually. Add eggs one at a time. Add vanilla.
6) Add the flour mixture gradually, stirring well.
7) Add the milk and chocolate.
8) Pour into cake pans.
9) Bake at 350 until the sides of the cake begin to pull away from the pan, about 35 minutes. Test with knife.
I let the cakes sit (covered) overnight, but you don't have to. They only need to be cool before you ice them, about 2 hours.
10) Prepare your buttercream frosting.
The food coloring is Wilton Sky Blue (just a dab, or it will be too dark). I made half a batch, but I would actually suggest a full batch.
11) Frost the top of the bottom layer of your cake.
12) Break and chop your heath bars, if using. Sprinkle on top of the frosting.
13) Frost the bottom of the top cake layer.
14) Place the top layer of the cake on the bottom. This will "sandwich" the heath bar crumbs in frosting.
15) Crumb coat your cake. Even if you using fondant, cover the whole cake.
16) Decorate as desired. You're done!
 |
| Looks like a giant It's-It! |
Disclaimer: I had never before made or worked with fondant, so it came out a little lumpy, and too sweet in my opinion. Next time I will use half the sugar and substitute fine cake flour for the other half of the sugar. I used cake flour instead of powdered sugar when I was rolling it, and it worked fantastically. I also used almond extract instead of vanilla, to give it a marzipan-like flavor. Here is my fondant recipe, although there are many others out there:
1 cup light corn syrup
1 cup shortening
1/2 teaspoon salt
1/2 teaspoon almond extract or clear vanilla extract
1 pound powdered sugar
3 cups cake flour plus a lot extra for rolling
food coloring as desired
1) Combine corn syrup and shortening in a mixer with the dough hook attachment. Blend together, scraping down sides of bowl with a spatula. This will be much harder to make without a mixer.
2) Add salt and almond extract.
3) Add sugar and cake flour gradually until a thick dough forms. Thicker than this:
4) If you want to make a little decoration using white fondant (such as the onesie on top of this cake), take a small amount of dough out now.
5) Coat your hands in a small amount of shortening. The shortening prevents the color from soaking into your hands. Nifty, eh? Remove dough from bowl. Add a tiny amount of food coloring and knead with hands. A little goes a long way. Mine was a little more ELECTRIC than I would have liked.
7) Place your fondant on a cake-floured or powdered-sugared surface.
8) Roll it out to about 1/4 inch thick.
9) For best results, follow these instructions for applying your fondant.
 |
| Cousin "Alice" with her cake. You can't see the baby bump, but it's definitely there! I guess that cake is just enormous. |


No comments:
Post a Comment